Postgres
Overview
| Feature | Available |
|---|---|
| Data normalization | No |
| Data invalidation for Unified API (also see Provider details) | Yes |
Setup
- Go to Connectors -> Destinations.
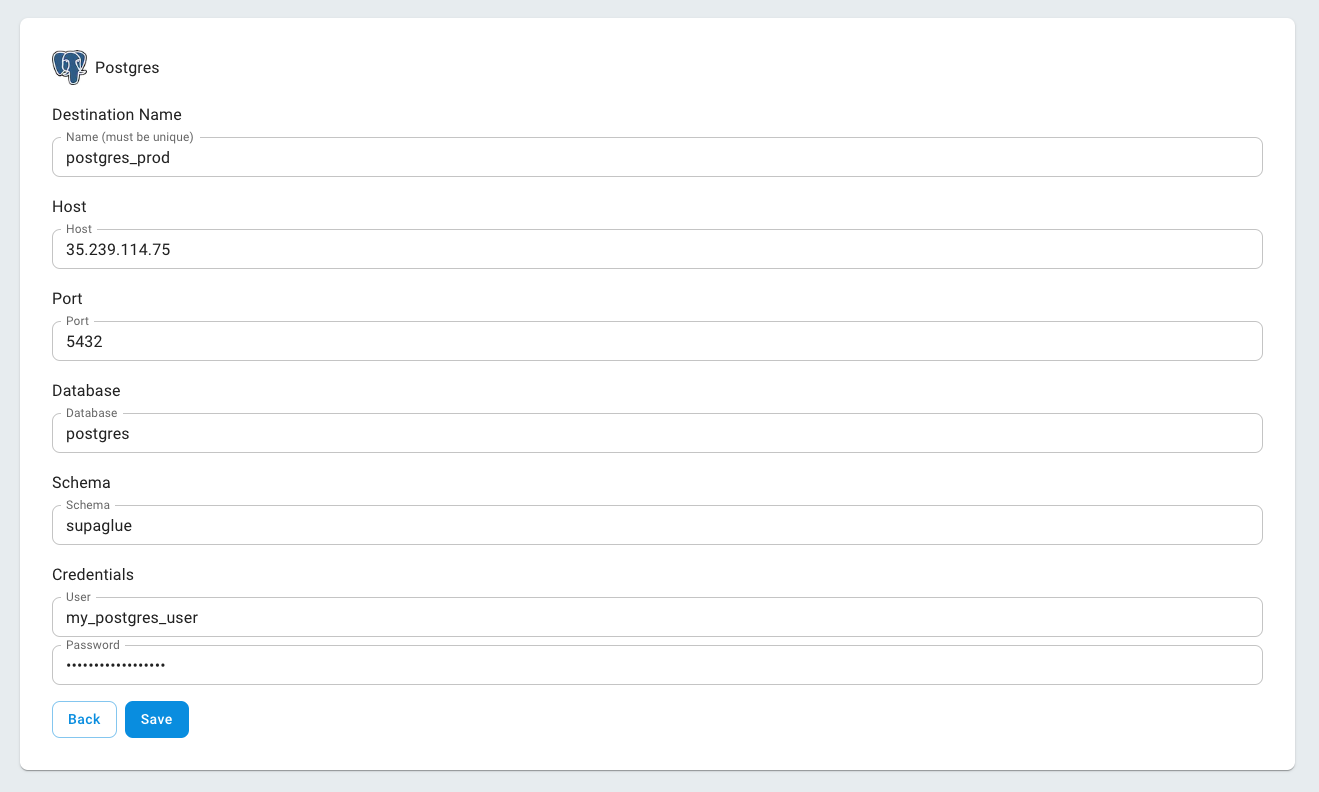
- Click the Configure button on the Postgres card.
- Enter your Postgres credentials.
Note that the postgres user will need write access to the schema/database you choose.

Data isolation
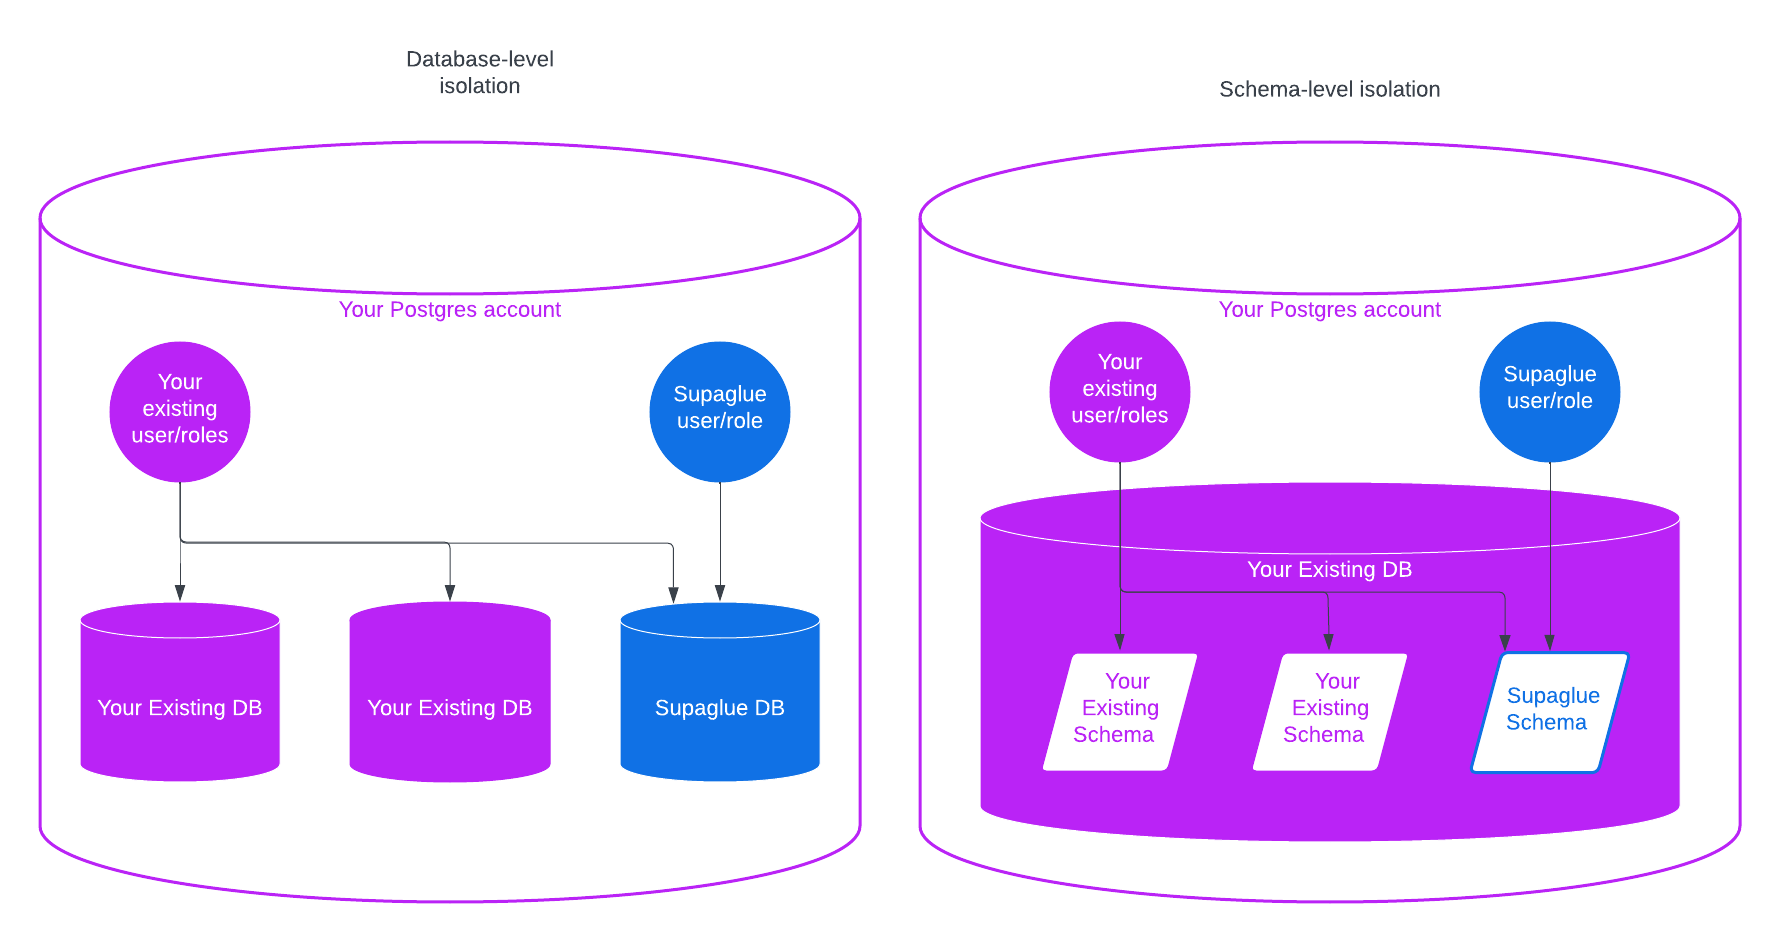
Supaglue lands tables into your Postgres. You can configure Supaglue to write to a separate physical/logical database or schema (see diagram below) by creating a user/role for Supaglue (see Setup).

In the steps below, we provide steps to create a separate Postgres role and schema for schema-level isolation between Supaglue and your application. Create a new Postgres user then run the following:
Grants
create schema supaglue;

create role supaglue_role;
grant connect on database <your db name> to supaglue_role;
grant all privileges on schema supaglue to supaglue_role;
grant all privileges on all tables in schema supaglue to supaglue_role;
alter default privileges in schema supaglue grant all privileges on tables to supaglue_role;
grant supaglue_role to supaglue_user;
Query patterns
Here are a few high-level best practices when working with tables that Supaglue land:
- Avoid adding database constraints
- Avoid altering the schema of the existing columns
- Minimize adding columns to the tables
- It's OK to add indexes. Just be aware of the upkeep costs
Schema Evolution
Supaglue may evolve the destination table schemas from time to time. To evolve schemas, drop your destination tables, and Supaglue will recreate the tables with the new schemas. Please reach out to (support@supaglue.com) if you need support for backward-compatible strategies.
IP Whitelist
The following are Supaglue's CIDR ranges:
54.214.243.61/32
54.201.123.169/32
44.226.37.107/32