Quickstart
This quickstart will show you how to integrate Supaglue with your application in approximately 10 minutes. By the end, you will have synced data from a sample customer's HubSpot and queried it.
1. Create your Supaglue account
Create a free Supaglue Cloud account here.
2. Configure a provider
Providers are the third-party SaaS platforms that your customers use, that you are integrating with. Supaglue supports a growing catalog of providers across multiple categories.
Navigate to the Connectors -> Providers tab and click Configure on HubSpot. Toggle on "Managed OAuth2 App".
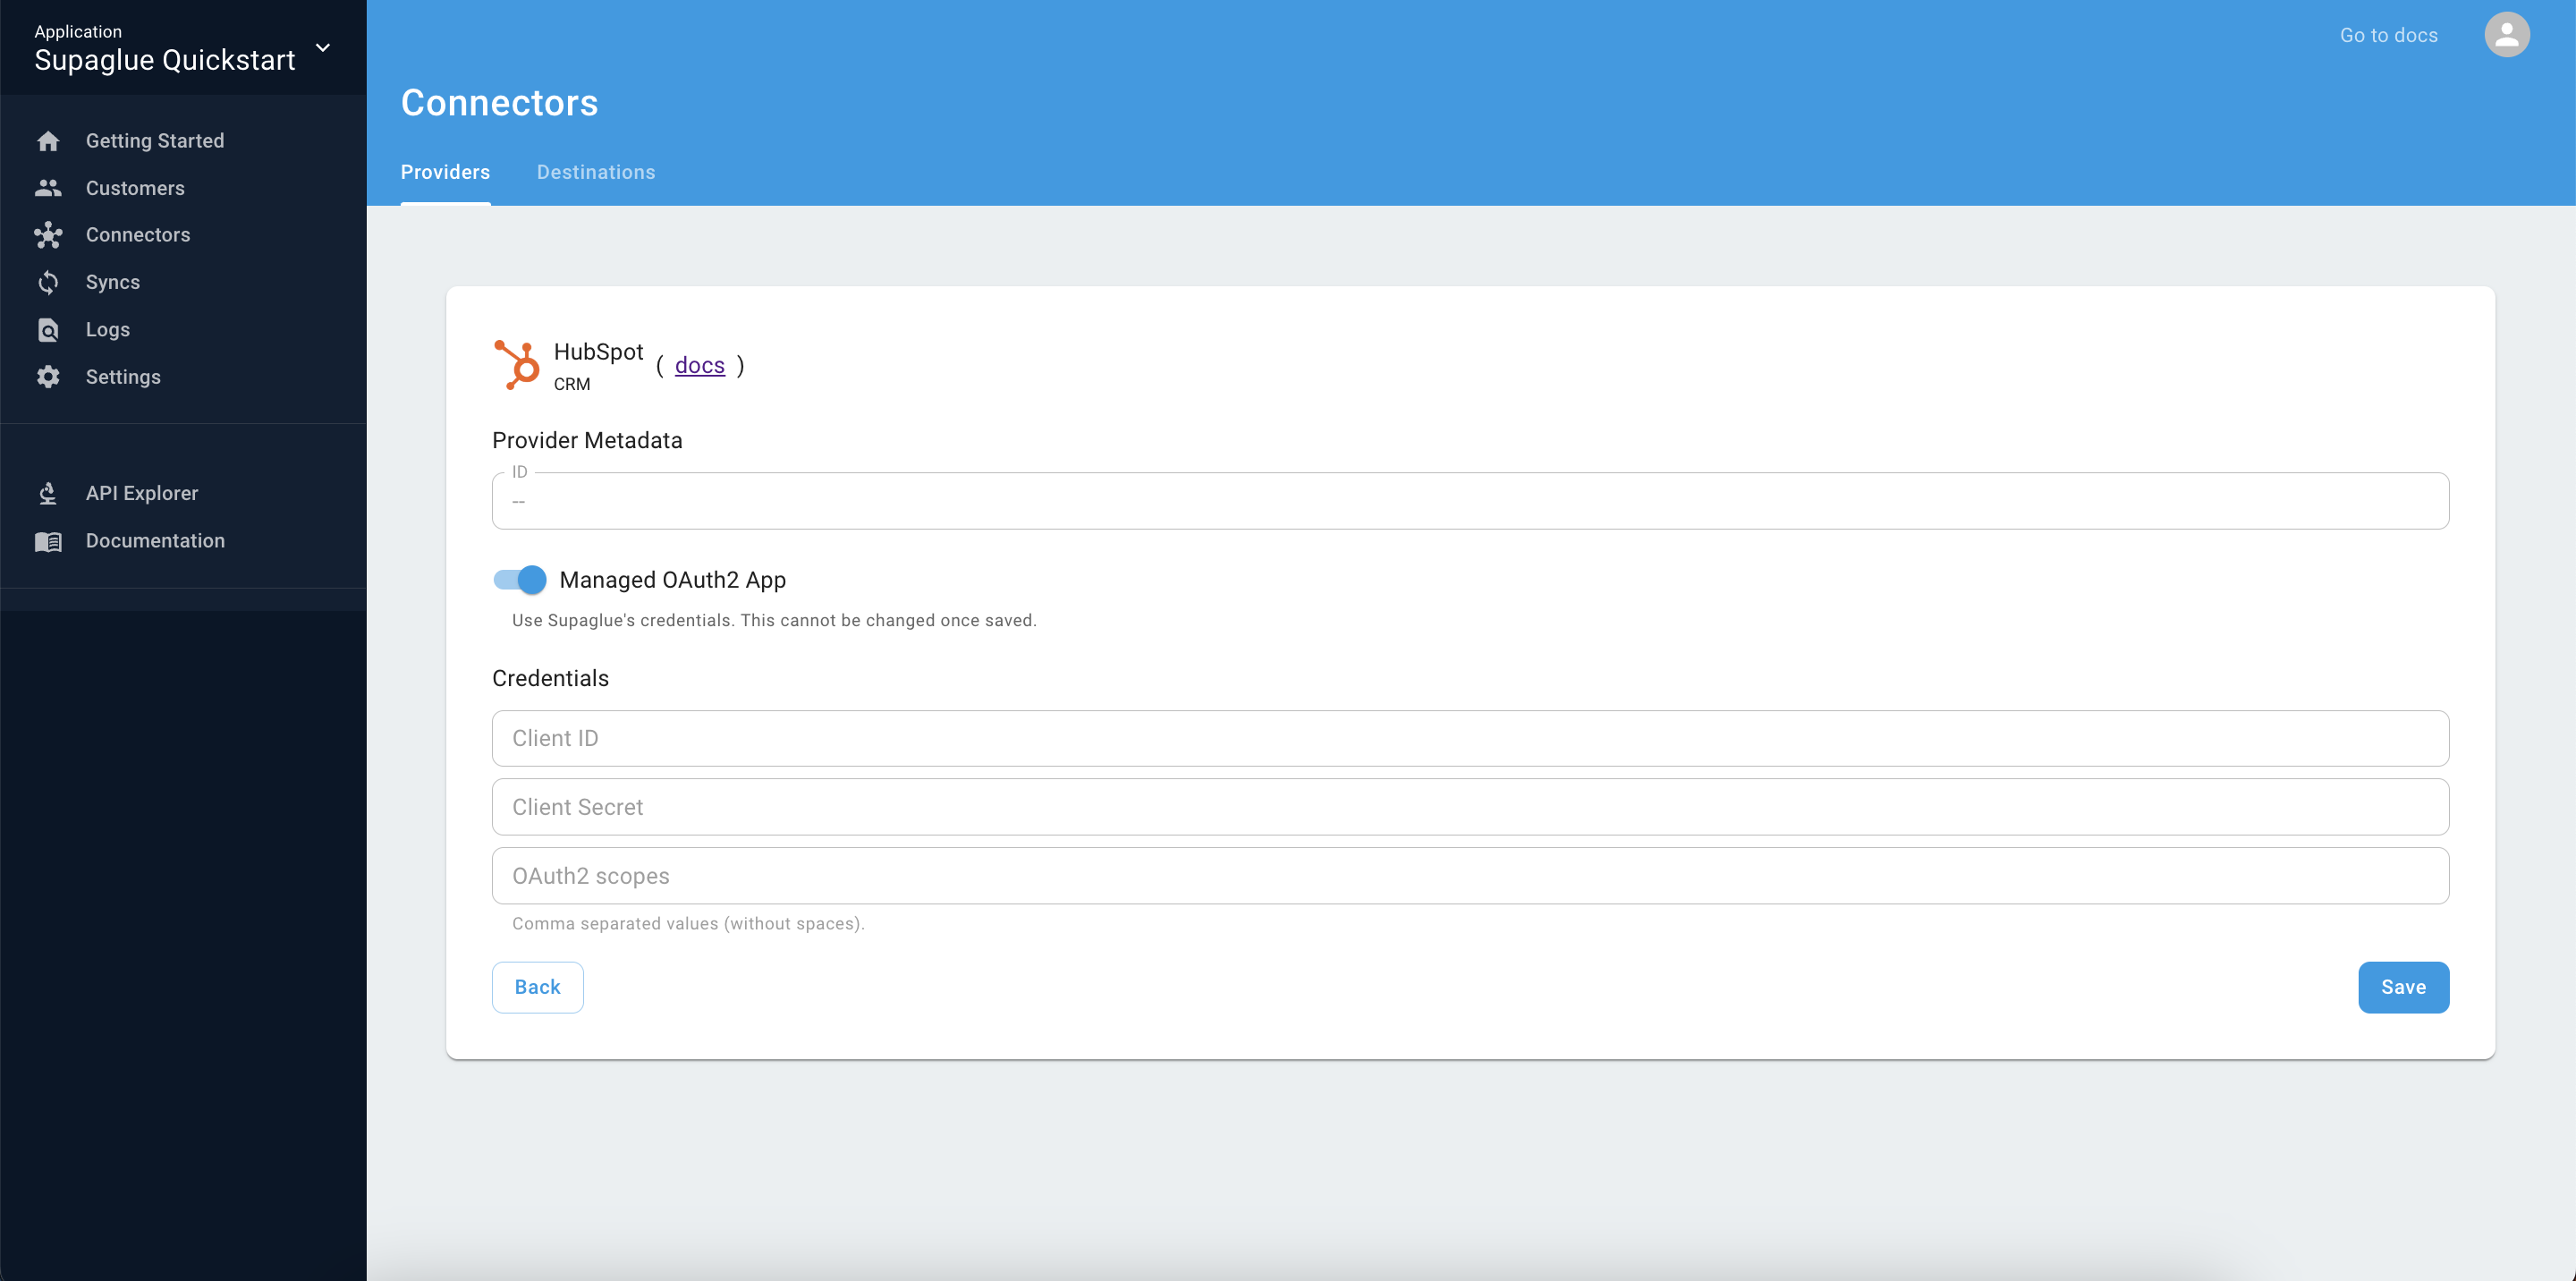
For convenience, we offer Supaglue-managed OAuth apps for certain providers if you don't have one yourself. We highly recommend using your own OAuth app for production.
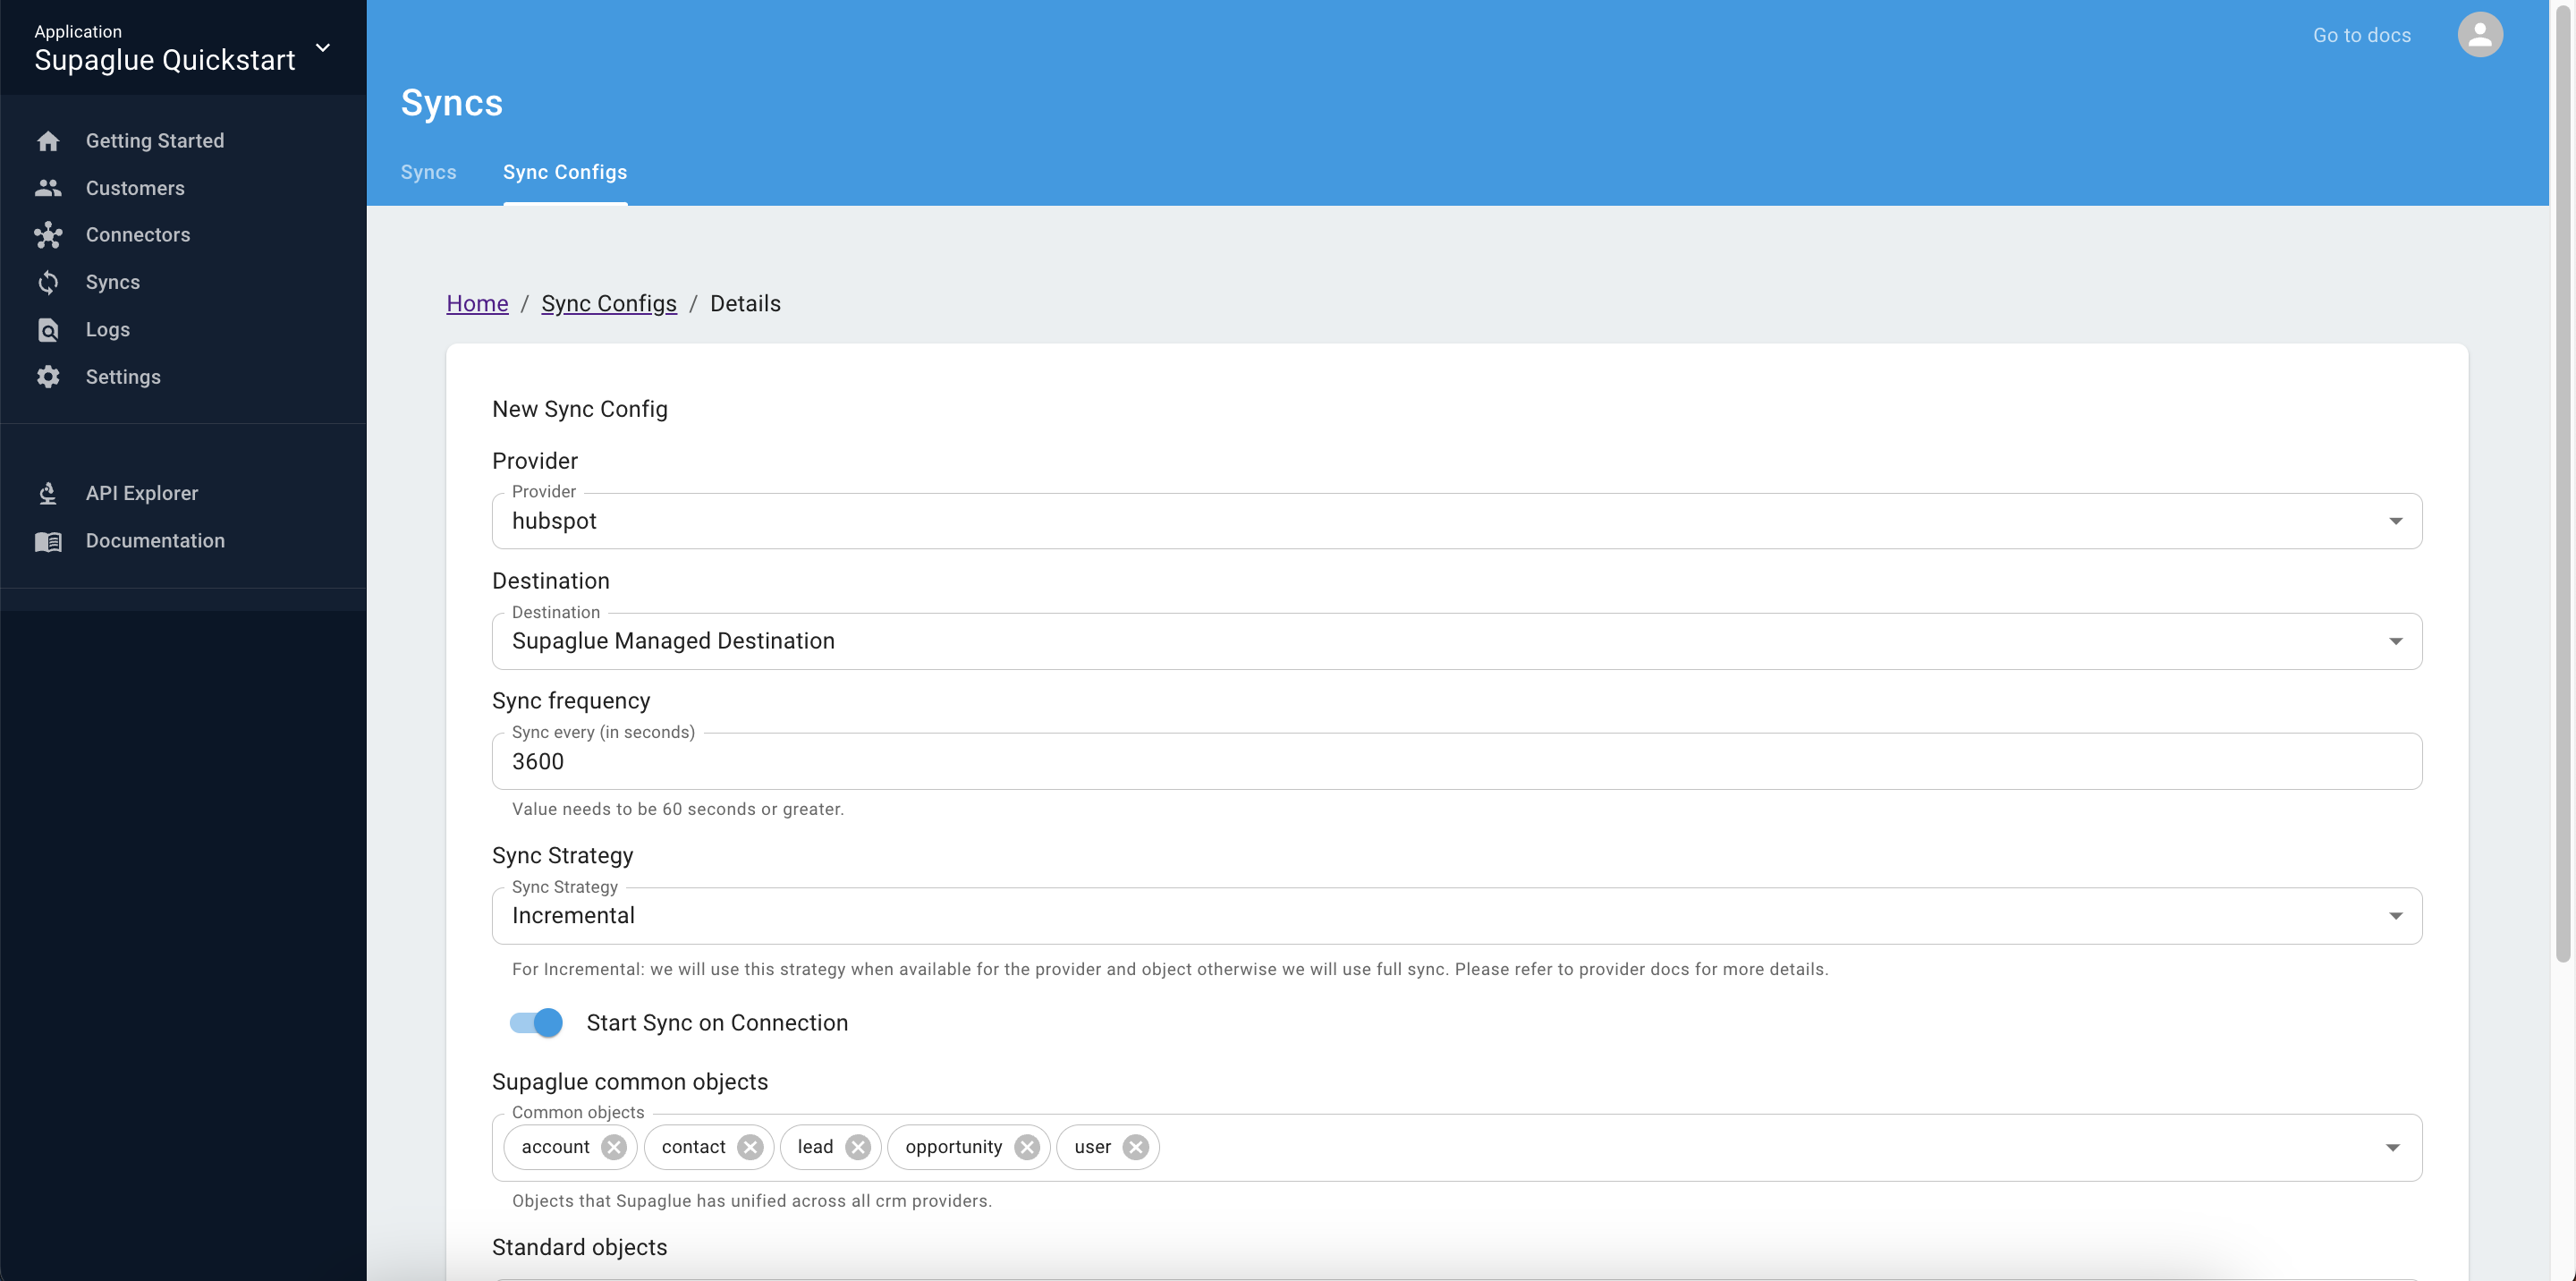
3. Define a sync configuration
A sync configuration defines which objects to sync from a Provider to a Destination, and how frequently.
- Go to the Sync Configs tab and click the "Add" button to add a new Sync Config.
- Select the HubSpot provider you configured earlier, and Supaglue Managed Destination for destination. Under "Common objects" select
contact, and click "Save".
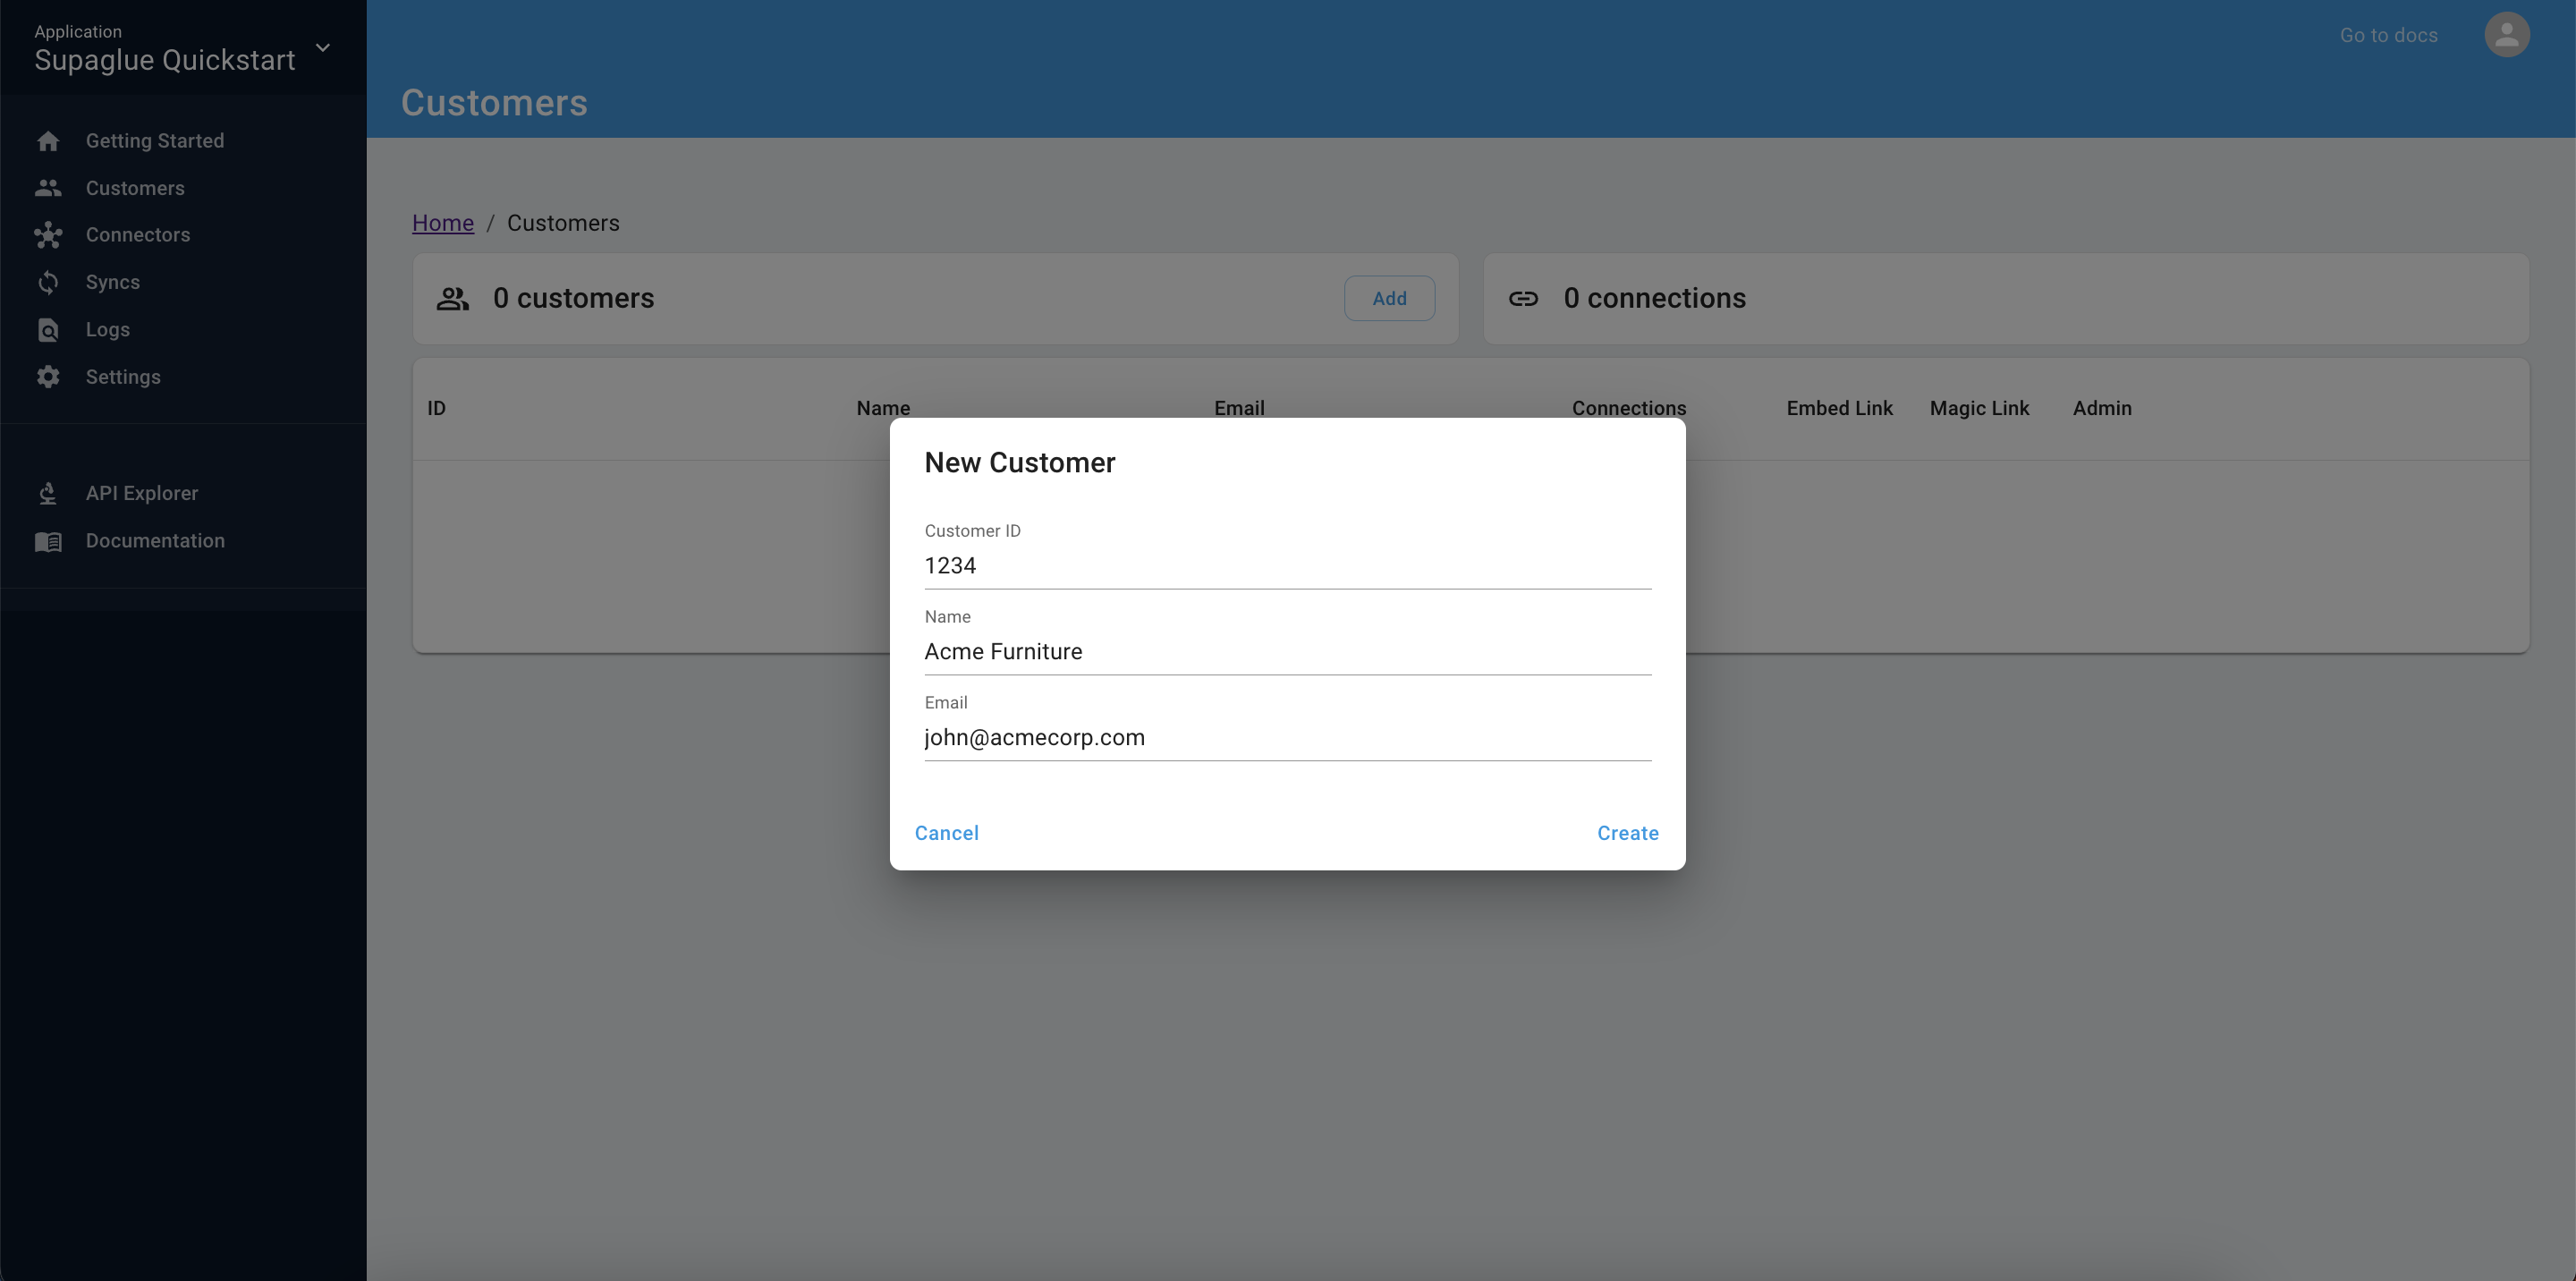
4. Register a customer
A Customer is an end user in your application who connects their 3rd-party SaaS provider to your application using Supaglue's Managed Authentication.
- Navigate to the Customers page and click on the plus button to create a sample customer:
- customer_id:
1234(the primary key you use in your application that uniquely identifies this customer) - name:
John Doe - email:
john@acmecorp.com
- customer_id:
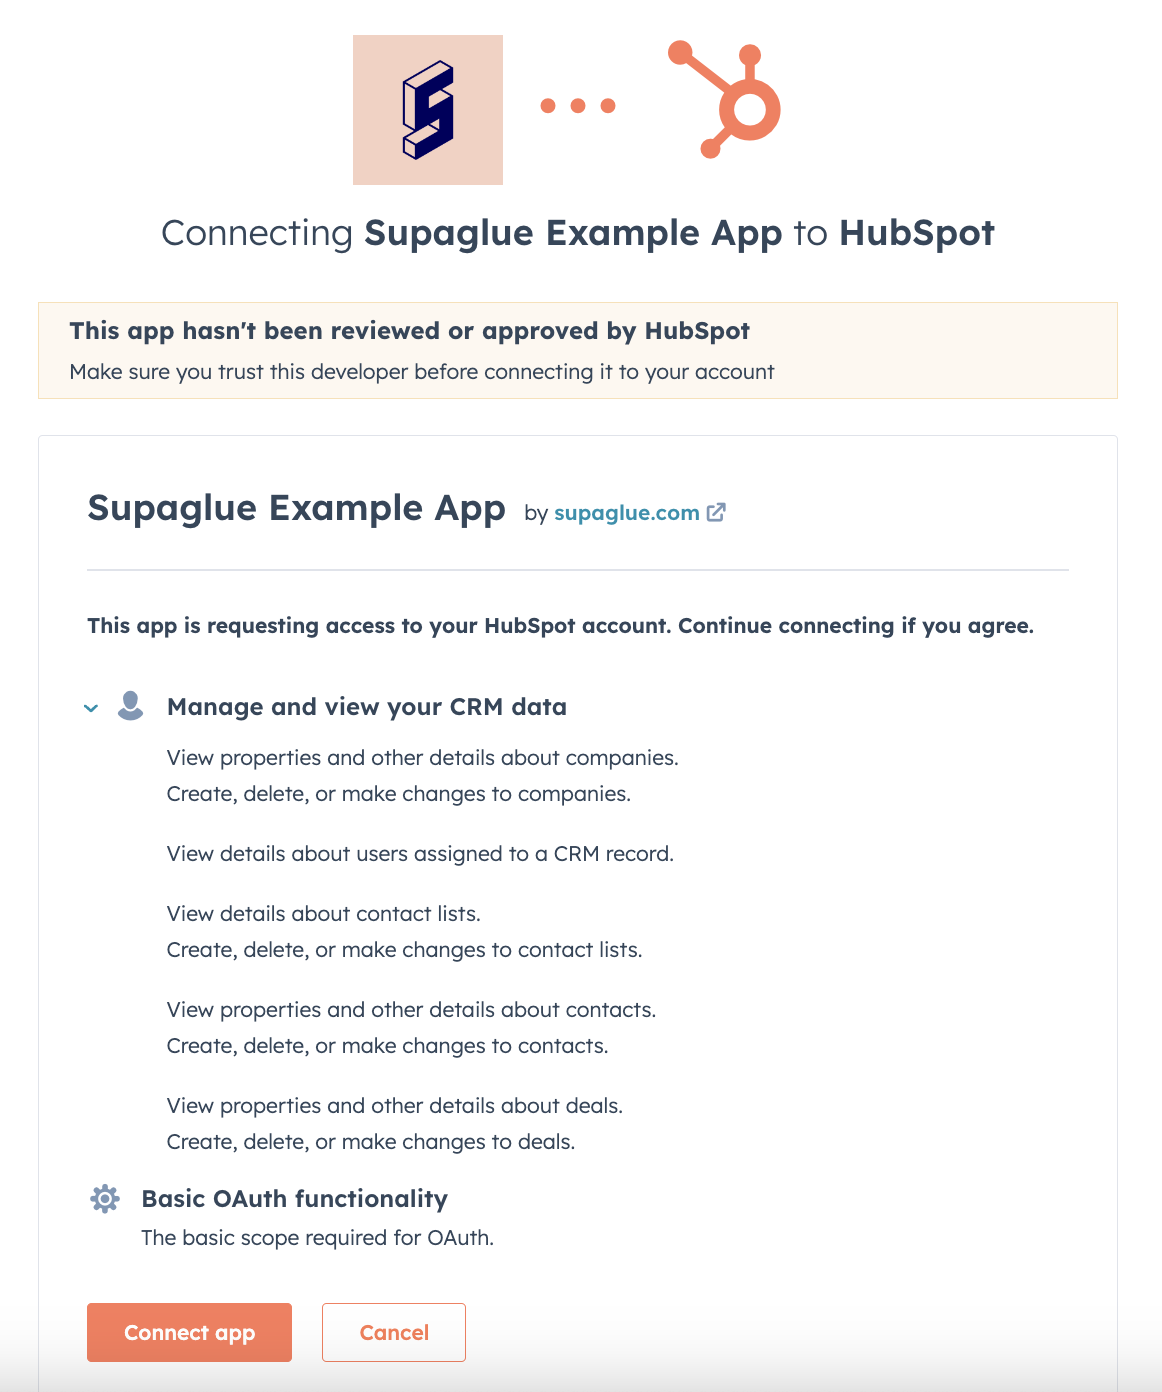
5. Create a connection
A Connection is a unique customer-provider pairing that enables you to read and write to a 3rd-party SaaS provider securely.
- Navigate to the Customer page and click the "Embed Link" button for the customer you just registered.
- Open a new tab in your browser and paste the URL into the URL bar.
- Complete the HubSpot OAuth flow, which installs the Supaglue-managed OAuth app in your HubSpot account with the requested scopes.
Typically, you would embed the Embedded Link in your application, so that your customers can establish connections in a self-serve way. Using the embedded link yourself emulates the experience your customers would experience. See managed authentication for more details.
6. Query the unified API
By default, managed syncs start executing as soon as new connections are created. Make a request to the List accounts Unified API endpoint to fetch Company records from your HubSpot account:
- Generate your API key which you can find under Settings -> API key.
- Replace
{API_KEY}with yours and run the following curl.
curl -L -X GET 'https://api.supaglue.io/crm/v2/accounts?read_from_cache=true' \
-H 'Accept: application/json' \
-H 'x-customer-id: 1234' \
-H 'x-provider-name: hubspot' \
-H 'x-api-key: {{API_KEY}}'
Next steps
Congrats on making it through! In just a few minutes, you've setup a HubSpot connection with a test customer, synced some Contact records, and queried it via a unified CRM API. There are many more things you can do with Supaglue, read on or reach out to our team to learn more.